How to Activate Airalo eSIM Before You Travel
Buying an Airalo eSIM is the easy part. Activating it is where many travelers either feel clever, connected, and slightly smug, or suddenly start tapping through phone settings at the airport with one eye on the baggage belt.
Airalo has become one of the best-known names in travel eSIMs because it makes the front end feel simple: pick a destination, choose a data plan, install the eSIM, then connect when you arrive. But the important detail is this: installing an eSIM and activating it are not always the same moment. That small distinction is where most confusion starts.
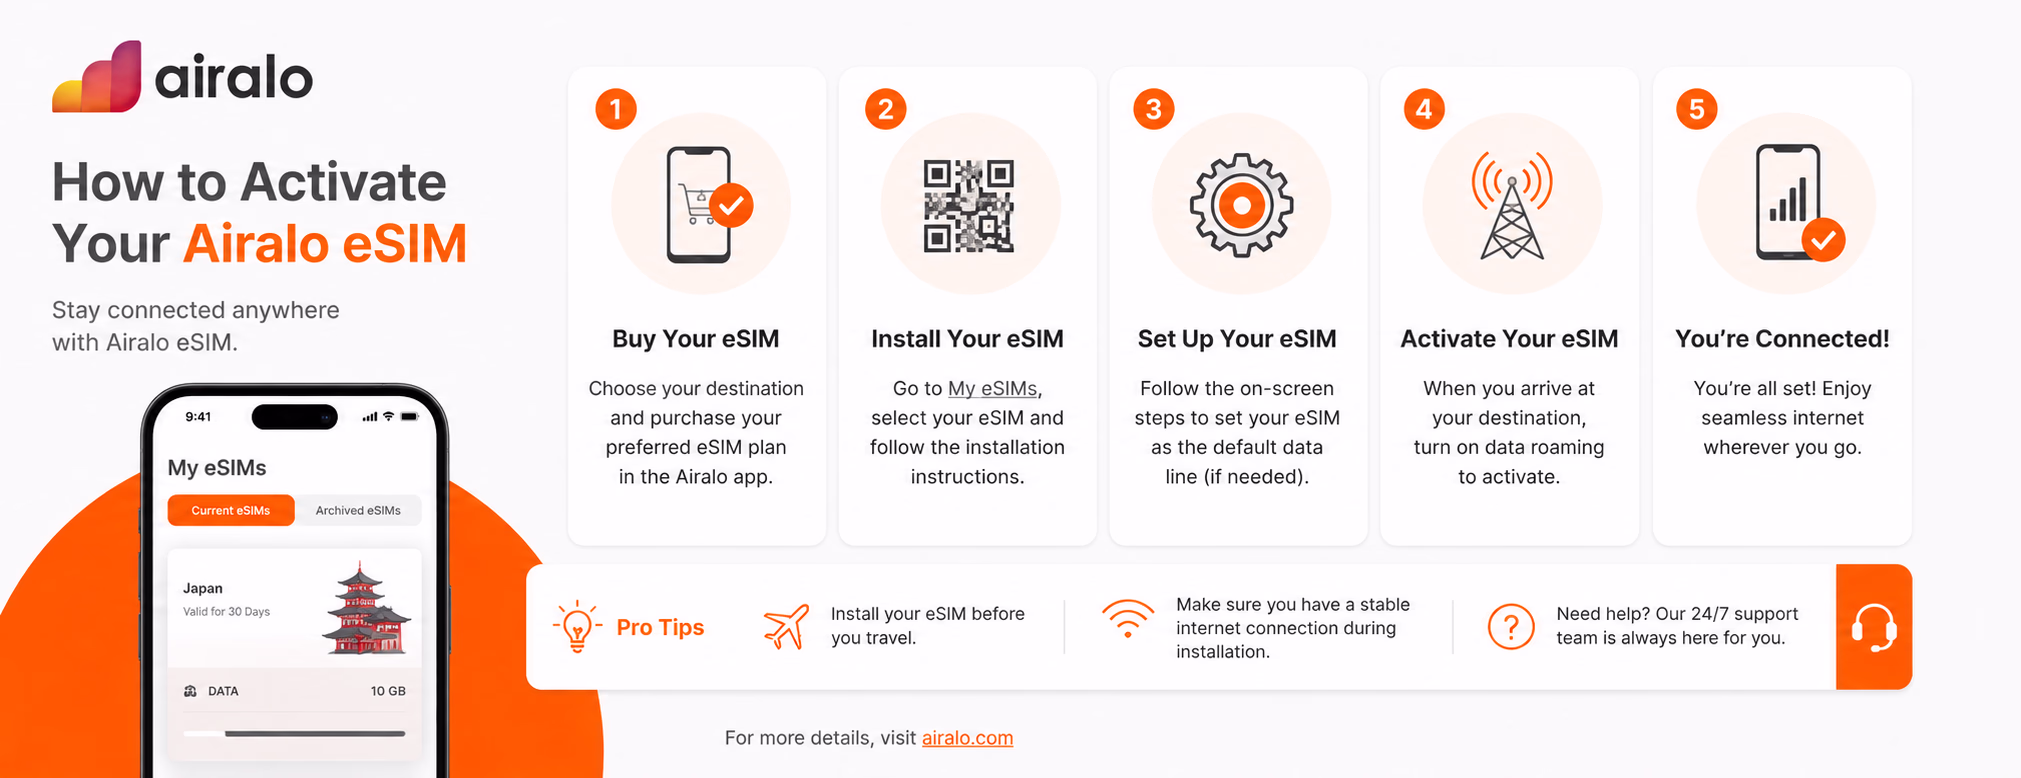
Airalo’s own guidance separates the process into three practical stages: buy the eSIM, install it, and then connect it to the destination network. The company also tells users to check the specific instructions inside the Airalo app under My eSIMs, because activation behavior can vary by plan and destination.
Before you touch settings
The first check is boring but essential: make sure your phone supports eSIM and is unlocked. Many recent iPhones, Google Pixels, and Samsung Galaxy devices do, but not every model in every market is the same. This matters more than travelers think, especially with phones bought through carriers or in regions where eSIM support is limited.
Apple says travelers can use a travel eSIM either as the only active mobile plan abroad or alongside their primary line. That dual-line setup is one of the quiet advantages of eSIM: you can keep your home number available for iMessage, banking verification, or emergency calls while using the Airalo eSIM for mobile data.
You should also install the eSIM while you still have stable Wi-Fi. Hotel Wi-Fi, home Wi-Fi, or airport lounge Wi-Fi is fine. What you do not want is to begin installation after landing, with weak airport Wi-Fi, a tired brain, and a taxi driver waiting outside.
Buy, install, then activate
Inside the Airalo app, the flow starts with choosing a local, regional, or global eSIM plan. After purchase, your eSIM appears under My eSIMs. From there, Airalo usually gives you installation options such as direct installation, QR code installation, or manual setup, depending on your device and plan.
For iPhone users, Airalo’s help center points users toward the Airalo app, then My eSIMs, then the selected eSIM, where the installation instructions appear. After installation, the iPhone settings step matters: go to Settings, then Cellular or Mobile Data, choose the new eSIM, turn on the line, and select it for mobile data. If Airalo’s plan instructions say data roaming is required, switch that on for the Airalo line, not your home SIM.
READ MORE: Travel eSIM Gets Smarter as Airalo Integrates Thales Tech
That last sentence is worth repeating in plain language: data roaming can be safe when it is enabled on the travel eSIM line. The expensive mistake is leaving your home SIM selected for data while roaming abroad.
The Android version
On Android, the path varies more because Samsung, Google Pixel, Xiaomi, and other devices name things slightly differently. Airalo’s Android guidance again starts inside the app: open My eSIMs, select the eSIM, tap View details, then follow the install or share instructions.
On Google Pixel, Google’s own support guidance says users can add an eSIM through Settings, then Network & internet, then SIMs, then Add SIM, then Set up an eSIM. After setup, the important part is choosing which SIM handles mobile data.
That is the Android pattern in general. Add the eSIM profile first. Then turn it on. Then select it for mobile data. Then check whether roaming or APN settings are needed according to Airalo’s in-app instructions.
When should you activate it?
This is the detail travelers often get wrong. Some eSIMs activate when installed. Others activate only when they connect to a supported network in the destination. Airalo says whether you should set up the eSIM before travel depends on the plan’s activation policy.
In practice, the safer routine is this: install the eSIM before departure, but do not turn it into your active data line until you arrive, unless Airalo’s instructions clearly say otherwise. Once you land, switch mobile data to the Airalo eSIM, turn on data roaming for that line if required, and wait a minute or two for the phone to register on a local network.
READ MORE: Airalo Discount Code Guide for Smarter eSIM Buying
If nothing happens, do not immediately delete the eSIM. That is one of the worst panic moves. Instead, restart the phone, check that the Airalo line is turned on, confirm mobile data is assigned to the Airalo eSIM, and look inside the Airalo app for network or APN instructions. Many “activation problems” are really selection problems: the eSIM is installed, but the phone is still trying to use the wrong line.
What Airalo gets right
Airalo’s strength is not that activation is magic. It is that the process is relatively well packaged for mainstream travelers. The app keeps the eSIM, instructions, plan details, and destination settings in one place. For people who do not want to compare obscure roaming bundles or hunt for a local SIM shop after landing, that is genuinely useful.
The company also benefits from market familiarity. A lot of travelers have now heard of Airalo, which reduces friction. In the eSIM market, trust matters. People are not only buying data. They are buying confidence that Google Maps, WhatsApp, Uber, hotel check-in links, train tickets, and banking apps will work when they need them.
Still, Airalo is not the only player solving this. Holafly leans heavily into unlimited-style travel data. Ubigi has a strong reputation among connected car, Japan, and frequent-traveler users. Nomad eSIM, Saily, GigSky, Yesim, and others all compete around coverage, app experience, plan flexibility, and price. The difference is increasingly less about “can I install an eSIM?” and more about how clearly the provider handles the messy middle: activation timing, throttling rules, hotspot use, refunds, network selection, and support when something does not connect.
|
New users
Try Airalo eSIMUse the discount code NEWTOAIRALO15 and get |
Existing users
Already have Airalo?Use the discount code AIRALOESIM10 and get 10% off your next Airalo eSIM purchase. |
Before takeoff
For most travelers, the cleanest Airalo activation routine looks like this:
Simple checklist
Buy the right destination plan before your trip.
Install the eSIM while connected to reliable Wi-Fi.
Label the line clearly, for example, “Airalo Japan” or “Airalo Europe.”
Keep your home SIM active for calls or SMS only, if needed.
When you arrive, select the Airalo eSIM for mobile data.
Turn on data roaming only for the Airalo line if the plan requires it.
Test maps, messaging, and browsing before leaving the airport.
Conclusion
Airalo activation shows where travel connectivity is heading. The old question was “Where do I buy a SIM card?” The new question is “Can I trust this app to connect me at the exact moment travel becomes stressful?”
Airalo does that well enough for many mainstream travelers, especially those who want a familiar app and clear destination plans. But the wider market is catching up fast. Apple and Google are making eSIM more central to the phone experience, and travel eSIM providers are being forced to compete on transparency, not just coverage claims.
That is good news for travelers. Activation used to feel technical. Now it is becoming part of the travel routine, like checking in online or adding a boarding pass to your wallet. The winners will not be the providers shouting “global coverage” the loudest. They will be the ones who make activation feel calm, obvious, and recoverable when something goes wrong. Airalo is already one of the reference names in that shift. But the next phase of the eSIM market will belong to whoever makes the user feel connected before they even have time to worry about it.