How eSIMs Can Save You from Airport SIM Card Chaos
We’ve all been there. You just landed in a new country, excited to explore, but before you can even think about hailing a ride or checking Google Maps, you need a local SIM card. So, you follow the crowd to the airport kiosk, where you find a long line of tired travelers, overpriced plans, and pushy salespeople.

Sound familiar?
Enter eSIMs—the travel hack that lets you skip the chaos and get connected instantly. If you haven’t switched yet, you’re missing out on a game-changer that can save you time, money, and unnecessary stress. Let’s dive into why eSIMs are the future of hassle-free travel and how they can make your next trip smoother than ever.
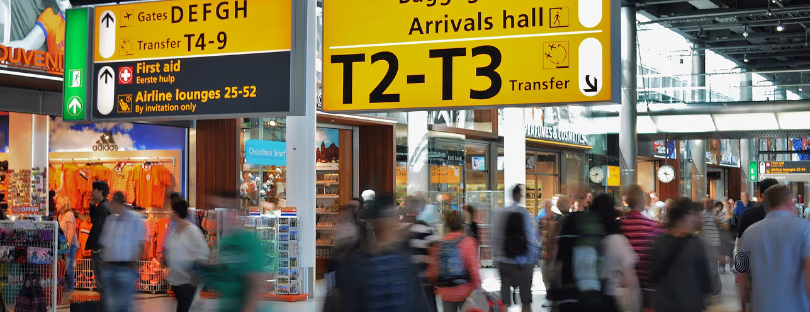
The Airport SIM Card Struggle Is Real
Airport SIM card kiosks seem convenient, but they come with a list of headaches:
1. Overpriced Plans
Airports are notorious for charging premium prices for everything, and SIM cards are no exception. You might end up paying way more than you would at a local store—or worse, getting stuck with hidden fees and limited data.
2. Long Lines and Wasted Time
After a long flight, the last thing you want to do is stand in line. But if you rely on airport SIM kiosks, that’s exactly what you’ll be doing while others breeze past you to their taxis and hotels.
3. Pushy Salespeople
Many airport kiosks have salespeople who are more interested in making a quick sale than finding the best plan for you. They’ll upsell you on overpriced packages you don’t need, just because they know you’re desperate for connectivity.
4. Compatibility Issues
Not all SIM cards work seamlessly with every phone. Some travelers find out—too late—that the SIM they just bought isn’t compatible with their device. And now? They’re out of luck and out of cash.
 What Exactly Is an eSIM?
 What Exactly Is an eSIM?
An eSIM (embedded SIM) is a digital SIM card that’s built directly into your phone. Instead of physically swapping out SIM cards, you can activate a mobile plan digitally with just a few taps on your screen.
Most modern smartphones—like iPhones (XS and newer), Samsung Galaxy devices, and Google Pixels—support eSIM technology.
How eSIMs Save You from the Airport Madness
Now that we’ve established how much of a pain airport SIM cards can be, let’s talk about how eSIMs make everything easier.
1. Activate Before You Land
Imagine landing in a new country, turning on your phone, and being instantly connected. With an eSIM, you can purchase and activate your plan before you even board the plane.
No searching for kiosks, no dealing with confusing setups—just instant, seamless connectivity.
2. No More Overpaying for Data
eSIM providers offer competitive prices, often much cheaper than airport SIM cards. You can compare plans from different providers online and choose the best one for your needs without airport markup prices.
3. No Physical SIM Swaps
If you’ve ever lost or damaged a tiny SIM card while traveling, you know how frustrating it can be. With an eSIM, there’s nothing to lose, misplace, or accidentally break. It’s all digital, which means less hassle and more convenience.
4. Flexibility to Switch Plans
What if you run out of data or find a better deal? With traditional SIM cards, you’d need to hunt down a store, buy a new SIM, and manually switch it out. With eSIMs, you can switch plans in seconds—no stores, no lines, no stress.
5. Keep Your Home SIM Active
One of the best perks of eSIMs is dual SIM functionality. This means you can keep your home SIM active (for receiving texts, calls, or banking OTPs) while using your eSIM for data. No need to worry about missing important messages while traveling.
How to Get Started with an eSIM
If you’re new to eSIMs, don’t worry—it’s super easy to set up. Here’s a quick step-by-step guide:
Step 1: Check if Your Phone Supports eSIM
Before anything else, make sure your phone is SIM-compatible. Most flagship devices from Apple, Samsung, and Google support it, but it’s always good to double-check in your settings.
Step 2: Choose an eSIM Provider
Several eSIM providers are catering to travelers, including:
Compare their coverage, data plans, and pricing to find the best one for your destination. You can use the best eSIM finder and choose the best eSIM for you among 105+ providers.
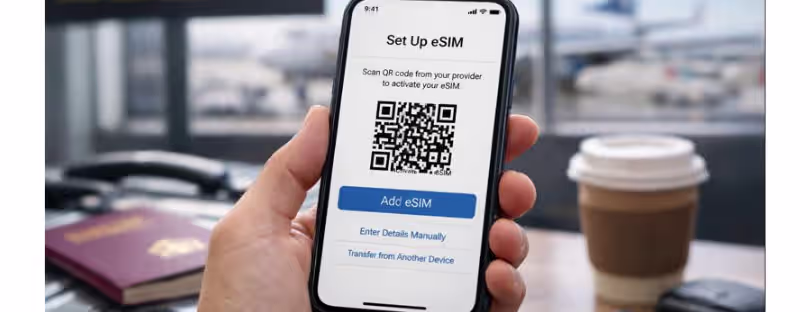
Step 3: Purchase and Download the eSIM
Once you’ve selected a plan, you’ll get a QR code or activation instructions via email. Simply scan the QR code with your phone, and your eSIM will be installed.
Step 4: Activate and Enjoy Seamless Connectivity
Before you fly, activate the eSIM and test it to make sure everything works. When you land, just switch to your eSIM plan, and you’re good to go!
Common Myths About eSIMs (Debunked!)
1. “eSIMs Are Too Complicated to Set Up”
Not at all! If you can scan a QR code, you can set up an eSIM. It’s easier than swapping a physical SIM.
2. “eSIMs Don’t Work Everywhere”
eSIM coverage is growing rapidly, and most major travel destinations now support it. Just make sure the provider you choose has coverage in your destination.
3. “I’ll Lose My Regular SIM”
Nope! You can keep your regular SIM active while using your eSIM for data, making it perfect for dual-SIM users.
Why Every Traveler Should Switch to eSIMs
If you love convenience, cost savings, and stress-free travel, switching to an eSIM is a no-brainer. Instead of wasting time at airport kiosks or dealing with overpriced SIM cards, you can land with instant connectivity and focus on what really matters—enjoying your trip.
So, next time you travel, skip the chaos and go digital with an eSIM. Your future self will thank you.
Have you tried an eSIM while traveling? Share your experience in the comments below!