How to Install eSIMs on Google Pixel
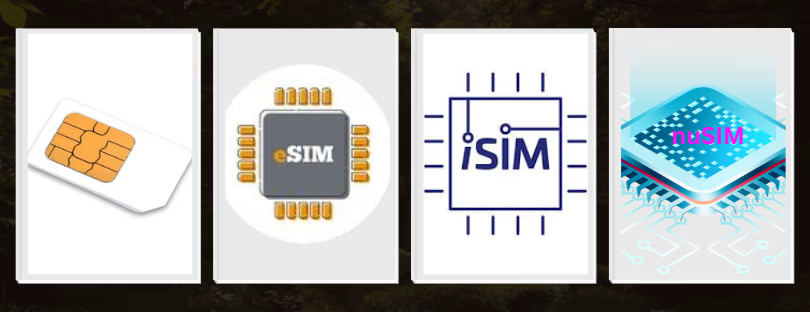
eSIM, short for embedded Subscriber Identity Module, is a revolutionary technology that has transformed the way we use SIM cards on our mobile devices. Google Pixel devices are among the smartphones that support eSIM technology, allowing users to easily switch between carriers, manage multiple plans, or use their phones internationally. Installing an eSIM on Google Pixel
In this comprehensive guide, we’ll walk you through the step-by-step process of installing eSIMs on your Google Pixel, and making the most of this innovative feature.
Understanding eSIM Technology on Google Pixel
Before diving into the installation process, let’s briefly understand what eSIMs are and how they work on your Google Pixel:
- Embedded SIM: eSIMs are electronic SIM cards embedded directly into your device’s hardware. Unlike traditional SIM cards, they cannot be physically removed.
- Carrier Activation: To use an eSIM, you need to activate it with a supported carrier. This typically involves scanning a QR code or entering an activation code provided by your carrier.
- Dual SIM Functionality: Google Pixel devices with eSIM support allow for dual SIM functionality. This means you can use one eSIM for your primary plan and another eSIM or a physical nano-SIM for a secondary plan.
- Flexibility: eSIMs offer unparalleled flexibility, allowing you to switch carriers, manage multiple plans, or use your phone internationally without swapping physical SIM cards.
Prerequisites for eSIM Installation on Google Pixel
Before proceeding with the eSIM installation, ensure that you meet the following prerequisites:
- Supported Google Pixel Model: Verify that your Google Pixel model supports eSIM technology.
- Carrier Support: Make sure your chosen carrier offers eSIM support for Google Pixel devices.
- Active Data Connection: You’ll need an active data connection (Wi-Fi or cellular) to download the eSIM profile.
Supported Google Pixel Models
Google is one of the earliest brands to support eSIM technology in their smartphones, and all the latest models come equipped with eSIM technology. Here is a list of Google Pixel models that are currently known to support eSIM:
- Google Pixel 2 (only phones bought with Google Fi service)
- Google Pixel 2 XL
- Google Pixel 3 (not including phones bought in Australia, Taiwan, or Japan). (Phones bought with US or Canadian carriers other than Spring and Google Fi don’t work with eSIM.)
- Google Pixel 3 XL
- Google Pixel 3a (not including phones bought in Japan or with Verizon service; not including phones bought in Southeast Asia)
- Google Pixel 3a XL
- Google Pixel 4 series
- Google Pixel 5 series
- Google Pixel 6 series
- Google Pixel 7 series
- Google Pixel 8 series
However, it is also imperative to note that while the devices themselves can support eSIM technology, not all telcos and operators provide eSIM support for the same devices. So before you commit to getting an eSIM, be sure to check with your mobile operator to make sure that your device is supported.
Step-by-Step Guide to Installing eSIMs on Google Pixel
Now that you understand the basics and have the necessary prerequisites in place, let’s dive into the step-by-step process of installing eSIMs on your Google Pixel:
1. Check eSIM Compatibility and Carrier Support:
- Navigate to Settings on your Google Pixel.
- Tap on Network & internet.
- Select Mobile network.
- Check if you see an option to Add a carrier or Download a SIM instead?. If you see these options, your Pixel model supports eSIMs.
- Confirm that your carrier offers eSIM support for Google Pixel devices. You can typically find this information on your carrier’s website or by contacting their customer support.
2. Obtaining Your eSIM Profile:
- QR Code: Many carriers provide a QR code for eSIM activation. This code is usually available on their website or through their app.
- Activation Code: Some carriers offer an activation code instead of a QR code. This code is typically a combination of letters and numbers.
- Carrier App: If your carrier has a mobile app, it may offer a streamlined way to download the eSIM profile directly to your Pixel.
3. Initiating eSIM Installation:
- Scanning QR Code:
- Open your Pixel’s camera app.
- Point the camera at the QR code provided by your carrier.
- Your Pixel should automatically recognize the code and prompt you to install the eSIM profile.
- Entering Activation Code:
- Go to Settings > Network & internet > Mobile network.
- Tap on Add carrier or Download a SIM instead?.
- Follow the on-screen instructions to enter the activation code provided by your carrier.
- Using Carrier App:
- If your carrier has an app, open it and look for the option to activate eSIM service.
- Follow the instructions within the app to download and install the eSIM profile.
4. Configuring Your eSIM Profile:
- Default Line: If you’re using dual SIM functionality, you’ll be prompted to choose which SIM to use for calls, SMS, and data by default. You can customize these settings later.
- Labeling: You can label your eSIM profiles (e.g., “Work,” “Personal,” “Travel”) to easily distinguish between them.
5. Activating Your eSIM:
- Follow the remaining on-screen instructions to complete the activation process.
- Your Pixel will download and install the eSIM profile. This may take a few minutes.
- Once the installation is complete, your eSIM should be active and ready to use.
Using Dual SIMs Installing an eSIM on Google Pixel
If you have a Pixel 3a or later Pixel phone, your phone comes with the capability to support dual SIMs using an eSIM. This means that you have the option of using two SIMs: one physical SIM card and one eSIM. You will be able to use different SIMs for different actions, such as messaging, calling, or data. This feature is known as Dual SIM Dual Standby (DSDS).
And if you are on a Pixel 7 or Pixel 7 Pro phone, it is also possible for you to use two eSIM profiles simultaneously. However, this is subject to whether your carrier supports it.
It is easy to switch between the different SIM or eSIM profiles. Simply go to Settings > Network & Internet > SIMs > Your Network and set your preferred profile for each action.
Managing eSIMs on Google Pixel
After successfully installing your eSIM, you can manage it through your Pixel’s settings:
- Switching Default Line: Go to Settings > Network & internet > Mobile network > Preferred SIM.
- Renaming eSIM Profiles: Go to Settings > Network & internet > Mobile network. Tap the eSIM profile you want to rename.
- Disabling or Removing eSIMs: Go to Settings > Network & internet > Mobile network. Tap the eSIM profile you want to disable or remove.
Tips for Optimal eSIM Usage on Google Pixel
Here are some additional tips to get the most out of your eSIM experience on Google Pixel:
- Update Carrier Settings: Regularly check for carrier settings updates. These updates often include improvements for eSIM functionality.
- Travel with eSIMs: eSIMs are ideal for international travel. You can purchase local eSIM plans upon arrival, avoiding expensive roaming charges. Installing an eSIM on Google Pixel
- Manage Data Usage: Monitor your data usage, especially if you’re using multiple eSIM profiles or traveling internationally.
Troubleshooting eSIM Installation Issues on Google Pixel
If you encounter any issues during the eSIM installation process, try the following troubleshooting steps:
- Restart Your Pixel: A simple restart can often resolve minor glitches.
- Check Network Connection: Ensure that you have a stable data connection.
- Update Pixel Software: Make sure your Pixel is running the latest software version.
- Contact Your Carrier: If the problem persists, reach out to your carrier’s customer support for assistance.
Conclusion Installing an eSIM on Google Pixel
Installing eSIMs on your Google Pixel is a straightforward process that opens up a world of flexibility and convenience. By following this comprehensive guide, you can seamlessly activate and manage eSIM profiles, switch between carriers, and enjoy the benefits of this innovative technology. Embrace the future of mobile connectivity with eSIMs on your Google Pixel.
- AIRALO
-
eSIM for
Europe
39 countries
-
1 GB – 7 days – €4.53
3 GB – 30 days – €12.00
10 GB – 30 days – €33.40
- UBIGI
-
eSIM for
Europe
29 countries
-
500 MB – 1 day – €2.00
3 GB – 30 days – €8.00
10 GB – 30 days – €19.00
- Jetpac
-
eSIM for
Europe
28 countries
-
1 GB – 30 days – €0.90***
5 GB – 30 days – €11.00
10 GB – 30 days – €22.85
* Get your Airalo discount code here. ** All packages include 100 Mins of local calls. ***Jetpac promo code: 1FOR1
If you have any questions about which package to buy, please reach out to our friendly Customer Support team via email: info@alertify.eu


