New iPhone? Keep Your Number and eSIM with This Quick Transfer Guide
eSIM, which stands for embedded SIM, is a digital SIM that allows you to activate a cellular plan from your carrier without having to use a physical nano-SIM card. eSIM technology was introduced on iPhones in 2018 with the iPhone XS, iPhone XS Max, and iPhone XR models. transferring esim to new iphone

Instead of having to insert a plastic SIM card into your iPhone, an eSIM is built into the device and can’t be removed. The eSIM contains your phone number and cellular plan information, just like a regular SIM card. When you want to activate or change cellular service, the necessary information and profiles can be provisioned and updated over the air without having to swap out a SIM card.
eSIM makes it easy to transfer phone numbers and services when upgrading to a new iPhone. Since the eSIM is embedded, you don’t have to obtain a new SIM card from your carrier and wait for it to be shipped. The transfer process for an eSIM is all done digitally.
When You Need to Transfer Your eSIM
You will need to transfer your eSIM when upgrading to a new iPhone model. Apple first introduced eSIM support with the iPhone XS, iPhone XS Max, and iPhone XR in 2018. The eSIM allows you to store digital SIM profiles on your iPhone instead of using a physical nano-SIM card.
When you upgrade to a newer iPhone model that also supports eSIM, you will need to transfer the eSIM from your old iPhone to your new iPhone. This ensures you keep the same cellular plan and phone number without having to get a new physical SIM card.
For example, if you are upgrading from an iPhone XS to an iPhone 14 Pro, you will need to remove the eSIM from the iPhone XS and move it to the iPhone 14 Pro. This transfer process allows you to continue using your existing cellular plan on the new device.
Back-Up Your iPhone transferring esim to new iphone
Before transferring your eSIM to a new iPhone, it’s important to back up your current iPhone data. This ensures you don’t lose any important information during the transfer process. You have two options for backing up your iPhone – using iCloud or iTunes.
Using iCloud
iCloud provides an easy wireless way to back up your iPhone. To backup to iCloud:
- Connect your iPhone to a WiFi network.
- Open the Settings app and tap on your name at the top of the menu.
- Tap on iCloud > iCloud Backup.
- Tap on Back Up Now to perform a manual backup.
iCloud will automatically back up your iPhone daily when connected to WiFi and power. However, it’s a good idea to manually trigger a backup right before transferring your eSIM.
Using iTunes
You can also back up your iPhone by connecting it directly to your computer using iTunes. To backup with iTunes:
- Connect your iPhone to your computer using the included USB cable.
- Open iTunes on your computer.
- Select your iPhone from the top-left navigation menu.
- Click on Summary in the left sidebar.
- Click on Back Up Now to perform a manual backup.
The iTunes backup will save all of your device data, including photos, messages, contacts, and more. Keep your iPhone connected during the entire backup process.
Backing up your current iPhone ensures you have a saved copy of all your data before transferring your eSIM.

Remove the eSIM from Your Old iPhone
Before transferring your cellular plan to a new iPhone, you’ll need to remove the eSIM from your old iPhone. Here’s how:
- On your old iPhone, open the Settings app.
- Tap on Cellular or Mobile Data.
- Select your cellular plan.
- Tap on Remove Plan.
- Confirm that you want to remove the cellular plan.
This will delete the eSIM from your old iPhone so that you can transfer your cellular service to your new device. It’s an important step, so don’t forget to do this before setting up your new phone!
Once the eSIM is removed, your old iPhone will no longer have mobile data or calling capabilities. This prepares it to transfer the cellular plan over to the new iPhone.
Set Up Your New iPhone transferring esim to new iphone
When you first turn on your new iPhone, it will take you through the initial setup process. Here are the steps to get your new iPhone set up:
-
Press and hold the side button to turn on your new iPhone.
-
On the Hello screen, select your language and region. Tap Continue.
-
When asked, connect your iPhone to a WiFi network so you can activate and set up your device.
-
The Setup iPhone screen appears. You can set up your new iPhone in two ways:
-
Set up as a new iPhone: Tap “Set Up as New iPhone” to set up your device without transferring any data or settings from another iPhone. This will allow you to start fresh.
-
Restore from iPhone backup: Tap “Restore from iPhone Backup” to transfer data and settings from a previous iPhone backup. This allows you to restore your settings and data from another iPhone.
-
-
If setting up as a new iPhone, follow the on-screen prompts to set up Face ID or Touch ID and create a passcode.
-
On the Data & Privacy screen, you can choose to enable or disable location services, analytics, and more. Make your selections.
-
Sign in with your Apple ID or create a new Apple ID if needed. This will allow you to access Apple services.
-
Review and agree to the terms and conditions.
-
On the Express Settings screen, you can choose to enable settings like Siri, Find My, and more. Tap Continue.
-
Tap Get Started to begin using your iPhone! Your device is now activated and ready to use.
-
If you choose to restore from a backup, you will be prompted to select the backup to restore from iCloud or your computer. Follow the on-screen prompts to restore your data and settings.
That covers the basic process of setting up a new iPhone. Once your device is set up, you can proceed to transfer your eSIM as outlined in the next sections.
Transfer Your Backup to the New iPhone
To get your data and settings onto your new iPhone, you’ll need to transfer a backup from your old iPhone. There are two main ways to do this – using an iCloud backup or an iTunes backup.
Using an iCloud Backup
If you backed up your old iPhone to iCloud, you can easily transfer that backup to your new iPhone:
-
Turn on your new iPhone and go through the initial setup prompts.
-
When asked how you want to set up your new iPhone, tap “Restore from iCloud backup“.
-
Sign in with your Apple ID and password if prompted.
-
On the next screen, select the iCloud backup you want to transfer from. This should be the most recent backup from your old iPhone.
-
Your new iPhone will download the iCloud backup and then restore your data and settings onto the new device.
-
Once completed, your new iPhone will be an exact copy of your old one. All your apps, photos, messages, settings etc will be there.
Using an iTunes Backup
If you backed up your old iPhone using iTunes on a computer, you can transfer that backup to your new iPhone:
-
Connect your new iPhone to the computer you synced your old iPhone with. Open iTunes.
-
When prompted, choose to restore from the iTunes backup of your old iPhone.
-
iTunes will download the backup file to your new iPhone and restore its contents.
-
Once finished, your new iPhone will be restored with the apps, data, and settings from your old device.
No matter which method you use, transferring your backup is the easiest way to get your old iPhone’s data onto your new device. Just be sure to complete the backup before erasing your old iPhone.
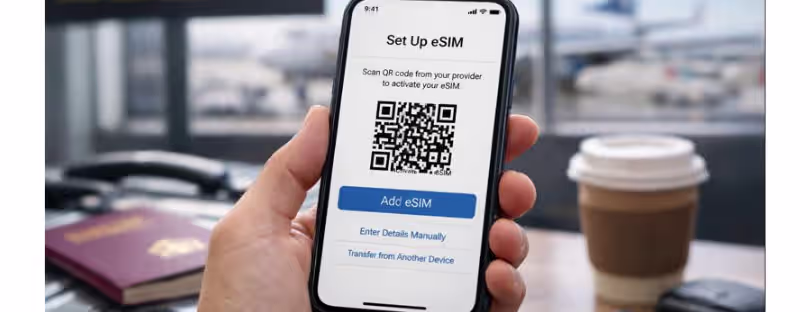
Add the eSIM to Your New iPhone
To add the eSIM to your new iPhone you have two options – scan a QR code provided by your carrier or download the eSIM directly using your carrier’s app.
Scanning a QR Code
If your carrier provides a QR code, you can easily scan this code to add the eSIM to your new iPhone.
- Open the Settings app and go to Mobile Data > Add Mobile Plan.
- Tap Scan QR code.
- Use your iPhone’s camera to scan the QR code provided by your carrier.
- Follow the on-screen prompts to finish adding the eSIM.
Scanning the QR code directly transfers your cellular plan and eSIM profile to the new iPhone. This is the fastest and easiest way to transfer an eSIM to a new device.
Downloading the eSIM
If your carrier doesn’t use QR codes, you may need to install their app and download the eSIM directly.
- Install your carrier’s app on your new iPhone if you haven’t already.
- Open the app and find the eSIM or mobile plan transfer option.
- Follow the prompts to download the eSIM to your new device.
- You may need to log in to your carrier account or provide additional verification.
- Once finished, your cellular plan and eSIM will be activated on the new iPhone.
Downloading the eSIM through your carrier’s app takes a few more steps but still allows you to seamlessly transfer mobile service. Contact your carrier if you have any issues.
Activate Your Cellular Plan
Once the eSIM has been transferred to your new iPhone, you will need to contact your carrier to activate cellular service on the new eSIM. This typically involves the following steps:
-
Call or chat with your carrier’s customer support. Let them know you got a new iPhone and need to activate the service on your eSIM.
-
The carrier will ask for your account information and new iPhone details to link your line to the eSIM. Have your account number, phone IMEI number, and ICCID ready.
-
The activation process usually only takes a few minutes. The carrier will provision your line so it works with the eSIM in the new phone.
-
After activation, you should see the cellular plan active on your new iPhone. Make a test call or use mobile data to confirm it is working.
-
If you run into any issues with activation, double-check that the eSIM was transferred properly. Contact carrier support if you still have trouble activating service on the new eSIM.
-
Some carriers may charge an activation fee for eSIM transfers. Check with your provider.
The activation step links your cellular plan to the eSIM in your new device. Be sure to contact your carrier promptly after transferring the eSIM so you can start using mobile service on your upgraded iPhone.

Troubleshooting Tips
If you run into issues when transferring your eSIM to a new iPhone, here are some troubleshooting tips:
-
Cannot remove eSIM from old iPhone – Go to Settings > Cellular > Manage eSIMs, and tap on your eSIM line. Tap Remove SIM. If it doesn’t work, contact your carrier for help removing the eSIM.
-
New iPhone not detecting eSIM – Make sure both iPhones are updated to the latest iOS version. Restart both phones. Check if your new iPhone has eSIM capability. Contact your carrier to confirm the eSIM transfer went through on their end.
-
Cellular plan not activating on new iPhone – Make sure Automatic Cellular Activation is enabled in Settings. Contact your carrier to make sure the eSIM is properly activated on their end. Reset network settings on the new iPhone.
-
Backup not transferring properly – Make sure you are using iCloud or iTunes to transfer an encrypted backup containing eSIM information. Double-check that the backup is completed properly before erasing the old iPhone. Fully set up a new iPhone, then restore from backup.
-
Cannot add eSIM to new iPhone – Confirm your carrier has your new iPhone’s details to provision an eSIM. Contact them to redo eSIM activation. Ensure the old eSIM is removed from your old iPhone first before adding to the new one.
-
If issues persist, contact Apple Support or your carrier for further specialized troubleshooting. The key is ensuring that eSIM is removed from your old iPhone and carrier has provisioned your account properly for the eSIM transfer.
Frequently Asked Questions
How do I backup my iPhone before transferring my eSIM?
You can back up your iPhone either using iCloud or iTunes. To backup to iCloud, go to Settings > > iCloud > iCloud Backup and turn on iCloud Backup. To backup using iTunes, connect your iPhone to your computer, open iTunes, select your iPhone, then click Backup Now.
What happens to my data/apps when I transfer my eSIM to a new iPhone?
Your data and apps will transfer seamlessly when you restore from an iPhone backup on your new device. Contacts, photos, emails, app data, etc. will remain intact. The only thing that won’t automatically transfer is your eSIM; you’ll need to manually move this over.
Do I need a new eSIM for my new iPhone?
No, you can transfer the existing eSIM from your old iPhone to your new one. You don’t need to get a new eSIM.
How do I remove the eSIM from my old iPhone?
Go to Settings > Cellular > Manage SIMs, and tap on your existing eSIM profile. Scroll down and tap Remove SIM to delete it from your old device.
What should I do if the eSIM transfer is not working?
First, make sure both devices are updated to the latest iOS version. Restart both iPhones and try the eSIM transfer again. If issues persist, you may need to contact your carrier for help troubleshooting. In rare cases, you may need to get a new QR code from them.
Is transferring an eSIM free?
Yes, you can transfer your existing eSIM from one iPhone to another free of charge. Carriers do not charge for this.
How long does it take to transfer an eSIM to a new iPhone?
The eSIM transfer process only takes a few minutes once you’ve completed the backup, activation, and restoration steps. The entire process can be done in under 30 minutes if you have everything ready.
Can I transfer my eSIM myself, or do I need to contact my carrier?
You can transfer your eSIM yourself without needing to contact your carrier. The process is straightforward and does not require help from your carrier.
What do I do if my eSIM transfer gets stuck on “pending” status?
First, toggle airplane mode on and off to try forcing a refresh. If that doesn’t work, you’ll need to restart both iPhones. As a last resort, you may need to reset the network settings on your new iPhone before trying the eSIM transfer again.