How to Plan Places to Visit on Vacation (With a Group!) Using Google Maps
Planning a vacation is exciting, but let’s be real—it can also be a little overwhelming. Especially when you’re traveling with a group. Everyone has their own ideas of what makes a perfect trip, and trying to keep track of all the must-see spots, restaurants, and activities can feel like herding cats. But what if I told you there’s a tool that can make this process smoother, more organized, and even fun? Enter: Google Maps. Yes, the same app you use to avoid traffic jams or find the nearest coffee shop can be your ultimate vacation-planning sidekick. So how to plan a vacation with Google Maps? Find out below.
Whether you’re traveling solo, with your family, or with a group of friends, Google Maps can help you plan, organize, and navigate your trip like a pro. Let’s dive into how you can use it to create the ultimate vacation itinerary.
Step 1: Start with a Blank Canvas (aka a New Map)
First things first, open Google Maps on your computer or phone. If you’re on a computer, click the menu button (the three horizontal lines in the top-left corner), then go to “Saved” and click “Maps.” From there, you can create a new map by clicking “Create Map.”
If you’re on your phone, you can still access your custom maps by opening the Google Maps app, tapping “Saved” at the bottom, and scrolling down to “Maps.” You can create a new map here too, but I recommend doing the bulk of your planning on a computer—it’s just easier to navigate.
Give your map a name, like “Summer 2024 Europe Trip” or “Beach Getaway with Friends.” This will be your master plan, so make it something memorable.
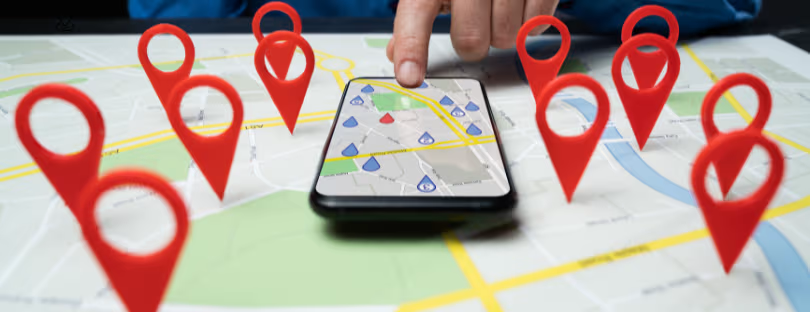
Step 2: Add All the Places You Want to Visit
Now comes the fun part: adding destinations. Start by brainstorming all the places you want to visit. Think big—landmarks, museums, restaurants, parks, beaches, and even that quirky little bookstore your friend won’t stop talking about.
To add a location to your map, simply search for it in the search bar at the top of the map. Once you’ve found it, click “Add to map.” You can customize the pin color and icon to make it easier to categorize places. For example:
- Use green pins for parks and outdoor spots.
- Use red pins for restaurants and cafes.
- Use blue pins for museums and cultural sites.
This visual system will make it easier to see what’s what at a glance.
Pro tip: If you’re traveling with a group, share the map with everyone early on. Click the “Share” button and invite your friends or family via email or a shareable link. This way, everyone can add their own suggestions and feel involved in the planning process.

Step 3: Organize Your Stops by Day or Area
Once you’ve added all the places you want to visit, it’s time to get organized. If you’re traveling to a city or region with a lot of attractions, group your pins by day or neighborhood. For example, if you’re spending three days in Paris, you might create layers for “Day 1: Eiffel Tower Area,” “Day 2: Montmartre,” and “Day 3: Louvre and Seine River.”
To do this, click “Add layer” on your map and give each layer a name. Then, drag and drop the relevant pins into each layer. This will help you see which activities are close to each other and plan your days more efficiently.
Step 4: Check Distances and Travel Times
One of the best features of Google Maps is its ability to calculate travel times and distances. Use this to your advantage! Click on two pins and then select “Directions” to see how long it takes to get from one place to another. This is especially helpful if you’re trying to figure out how much you can realistically fit into a day.
For example, if you’re in New York City and want to visit the Statue of Liberty in the morning and Central Park in the afternoon, Google Maps can tell you how long it’ll take to get from one to the other (and whether you’ll have time for a quick pizza stop in between).
Google Maps can also show you the best routes and schedules if you’re traveling by public transportation. Just make sure to double-check for any unexpected delays or closures.
Step 5: Save Offline Maps (Because Wi-Fi Isn’t Always Reliable)
Let’s face it: Wi-Fi and data can be spotty when traveling, especially in a foreign country. To avoid getting lost, save your map for offline use. Here’s how:
- Open the Google Maps app on your phone.
- Search for the area you’ll be visiting (e.g., “Rome, Italy”).
- Tap the name of the place at the bottom of the screen, then click “Download.”
Now, even if you lose signal, you’ll still have access to your map and directions. Just remember to download the map before you leave—you don’t want to be stuck without it!

Step 6: Collaborate with Your Group
Planning a trip with a group can be tricky, but Google Maps makes it easier. Once you’ve shared your map with everyone, encourage them to add their own suggestions and comments. For example, your foodie friend might know the best taco spot in Mexico City, while your history-buff cousin can recommend a must-see museum in Athens.
You can also use the map to vote on activities. If you’re not sure which restaurant to choose, add a note to the pin and ask everyone to comment with their preference. This way, you can make decisions as a group without endless group texts or emails.
Step 7: Add Personal Touches
Your Google Maps itinerary doesn’t have to be all business. Add some personal touches to make it more fun and meaningful. For example:
- Add photos to your pins to remind yourself why you want to visit a particular spot.
- Write notes about why a place is special or what you want to do there.
- Include links to blog posts, reviews, or YouTube videos for inspiration.
These little details will make your map feel more like a scrapbook than a to-do list.
Step 8: Be Flexible and Have Fun
Here’s the thing: No matter how well you plan, things don’t always go according to schedule. Maybe it rains on the day you were supposed to visit that outdoor market, or you discover a hidden gem that wasn’t on your original list. That’s okay!
Your Google Maps itinerary is a guide, not a rulebook. Use it to stay organized, but don’t be afraid to go off-script if something unexpected comes up. After all, some of the best travel memories come from spontaneous adventures.
Bonus Tips for Group Travel
Traveling with a group can be a blast, but it also comes with its own set of challenges. Here are a few tips to keep the peace and make sure everyone has a great time:
- Set expectations early. Before you start planning, have a conversation about everyone’s priorities and budget. This will help avoid surprises later on.
- Divide and conquer. If your group is large, consider splitting up for certain activities. Not everyone has to do everything together!
- Use shared apps. In addition to Google Maps, consider using apps like Splitwise to track expenses or WhatsApp to stay in touch.
- Be patient. Group travel requires compromise, so be prepared to go with the flow.
How to plan a vacation with Google Maps – final thoughts
Planning a vacation, especially with a group, doesn’t have to be stressful. With Google Maps, you can create a detailed, customizable itinerary that keeps everyone on the same page (literally). Plus, it’s a great way to build excitement and anticipation before your trip.
So, whether you’re exploring a new city, relaxing on a beach, or embarking on a road trip, let Google Maps be your guide. And remember: The best trips aren’t just about the destinations—they’re about the people you share them with. Happy travels!
P.S. If you have any favorite Google Maps tips or tricks, share them in the comments below. I’d love to hear how you use it to plan your adventures!